While rethinking through some of my Essbase outline settings for my Ironman database last night during a swim, I realized that I could remove about 90% of my frustration with the data entry process (and errors…) if I switched my method of entry to text lists. As I created these text lists, I documented one process for you to use in your own application.
1. In the “Properties” tab of the outline, set “Typed Measures enabled” to “true”. Note that this setting cannot be undone, so you had best be sure you want to do it!
2. Click on the “Text List Manager” tab of the outline to start creating your lists.
3. At the bottom of the left side of the screen, click “New”.
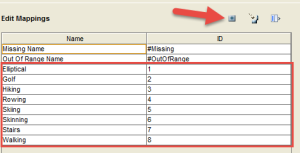
4. On the left hand side of the screen, enter the name of your new text list. Once you have created the name, the right hand side of the screen will become enabled so that you can add your custom text and associated IDs (numeric values).
5. Fill in your list by clicking on the plus button on the upper right hand side of the screen until you are finished. Note that you can give the IDs any value you would like!
6. In your outline, choose the member that you would like to attach the text list to.
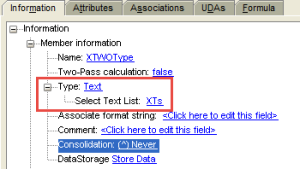
7. On the “Information” tab, look at the section called “Type”.
8. Change the type from numeric to text then select the correct text list from teh “Select Text List” dropdown list.
9. In Smart View, you will now have a drop down list to choose your text from in the cell. Note that if you want to run calculations against this member, you will need to use the ID value in your calc script, not the text value!


